用visustella来自定义技能消耗 发表于 2026-01-21 | 更新于 2026-06-12
| 总字数: 2.3k | 阅读时长: 9分钟 | 浏览量:
前言 首先算不上什么高技术力教程,只是一点自己的整理
然后开始之前先说明一下这个插件能干什么:根据你游戏里的某个数值(比如金币数,变量值之类的)画一个条,并且给这个条取一个名字。但它并不能直接控制你的这个数值 ,换句话说只能画个条给你看,想控制这个数值还是得你自己解决
准备工作 VisuStella 的 Core Engine 和 Skill and State Engine(前者为前置)
我打算写一个新的技能消耗条,并写一个消耗特定变量的技能
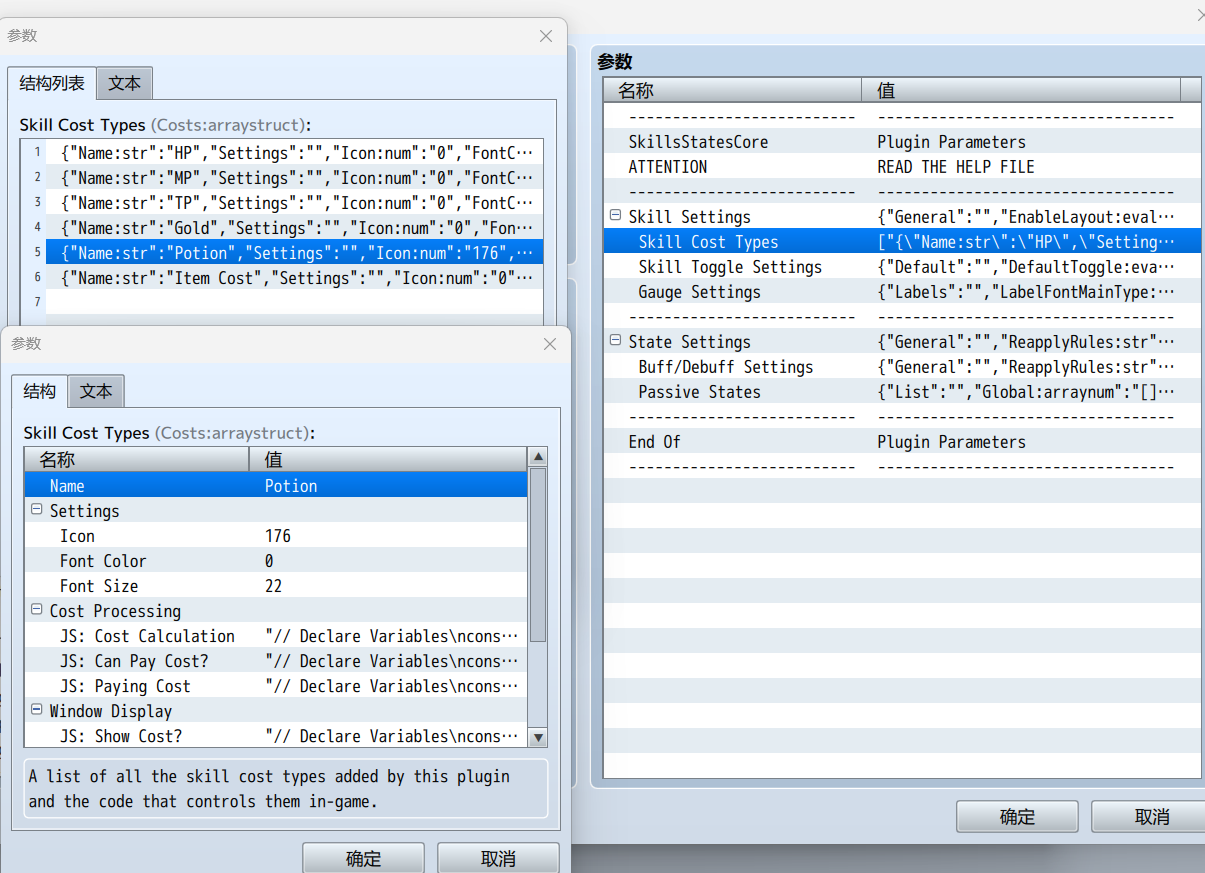
解读 设置自定义cost的地方就在这里了,这里自带的消耗道具的为例
那么要自定义消耗就要靠下面这一排JS了,大致分为三个部分
Cost Processing:技能消耗的流程,分为计算消耗、判断是否可进行消耗、进行消耗
Window Display:设置在窗口中的显示
Gauge Display:显示值槽的方式,包括最大值、当前值和值的具体绘制
接下来试着对这些代码进行解读。
首先是计算部分:
其实就是通过特性和注释标签的影响和修正,来得出实际消耗的值
1 2 3 4 const user = this ;const skill = arguments [0 ];let cost = 0 ;
首先对使用者和技能和消耗值进行声明,使用者就是该函数的调用者,技能编号和消耗都先设置为0
1 2 3 4 5 6 7 8 9 const note = skill.note ;if (note.match (/<POTION COST:[ ](\d+)>/i )) { cost += Number (RegExp .$1 ); } if (note.match (/<JS POTION COST>\s*([\s\S]*)\s*<\/JS POTION COST>/i )) { const code = String (RegExp .$1 ); eval (code); }
这里是读取技能注释中的设定,如果要自己写的话,就要注意把这里的注释标签给改了
1 2 3 4 5 6 7 8 9 10 11 12 if (cost > 0 ) { const rateNote = /<POTION COST:[ ](\d+\.?\d*)([%%])>/i ; const rates = user.traitObjects ().map ((obj ) => (obj && obj.note .match (rateNote) ? Number (RegExp .$1 ) / 100 : 1 )); const flatNote = /<POTION COST:[ ]([\+\-]\d+)>/i ; const flats = user.traitObjects ().map ((obj ) => (obj && obj.note .match (flatNote) ? Number (RegExp .$1 ) : 0 )); cost = rates.reduce ((r, rate ) => r * rate, cost); cost = flats.reduce ((r, flat ) => r + flat, cost); cost = Math .max (1 , cost); }
这里应用特性(就是数据库里右上角那一大块)对技能消耗的影响
1 2 3 4 5 6 7 8 9 10 if (note.match (/<POTION COST MAX:[ ](\d+)>/i )) { cost = Math .min (cost, Number (RegExp .$1 )); } if (note.match (/<POTION COST MIN:[ ](\d+)>/i )) { cost = Math .max (cost, Number (RegExp .$1 )); } return Math .round (Math .max (0 , cost));
这里就是应用消耗的最大值和最小值,同样是应用注释标签的内容
接下来是判断部分:
就是判断消耗够不够支付
1 2 3 4 5 6 7 8 9 10 11 12 const user = this ;const skill = arguments [0 ];const cost = arguments [1 ];const item = $dataItems[7 ]; if (user.isActor () && cost > 0 ) { return $gameParty.numItems (item) >= cost; } else { return true ; }
将道具数量与消耗数进行比较,根据结果返回 t / f ,如果消耗为0或使用者非角色,则返回true
进行实际的消耗
1 2 3 4 5 6 7 8 9 10 const user = this ;const skill = arguments [0 ];const cost = arguments [1 ];const item = $dataItems[7 ];if (user.isActor ()) { $gameParty.loseItem (item, cost); }
接下来开始就是视觉部分
是否显示消耗:
1 2 3 4 5 6 7 const user = this ;const skill = arguments [0 ];const cost = arguments [1 ];return cost > 0 ;
显示消耗的文本:
1 2 3 4 5 6 7 8 9 10 11 12 13 14 15 16 17 18 19 20 21 22 23 24 25 26 27 28 29 30 const user = this ;const item = $dataItems[7 ];const skill = arguments [0 ];const cost = arguments [1 ];const settings = arguments [2 ];const fontSize = settings.FontSize ;const color = settings.FontColor ;const name = settings.Name ;const icon = settings.Icon ;let text = '' ;text += '\\FS[%1]' .format (fontSize); if (color.match (/#(.*)/i ) && Imported .VisuMZ_1_MessageCore ) { text += '\\HexColor<#%1>' .format (String (RegExp .$1 )); } else { text += '\\C[%1]' .format (color); } text += '×%1' .format (cost); text += '\\I[%1]' .format (item.iconIndex ); return text;
就是显示字体的尺寸颜色,以及显示消耗量和对应图标,应该不用解释太多了
接下来就是绘制值槽的部分
首先是最大值
1 2 3 4 5 6 7 const user = this ;const item = $dataItems[7 ];return $gameParty.maxItems (item);
这里是通过获取道具的最大值来判断该消耗条的上限,如果打算用变量作为消耗,就直接填一个值就行了
然后是获取当前值
1 2 3 4 5 6 const user = this ;const item = $dataItems[7 ];return $gameParty.numItems (item);
直接获取当前道具数就行了,没什么可说的
然后就是绘制消耗条
1 2 3 4 5 6 7 8 9 10 11 12 13 14 15 16 17 18 19 20 21 22 23 24 25 26 27 28 29 30 31 32 33 34 35 36 37 const color1 = ColorManager .textColor (30 );const color2 = ColorManager .textColor (31 );const sprite = this ;const settings = sprite._costSettings ;const bitmap = sprite.bitmap ;const user = sprite._battler ;const item = $dataItems[7 ];const currentValue = sprite.currentDisplayedValue ();const bitmapWidth = sprite.bitmapWidth ();const bitmapHeight = sprite.textHeight ? sprite.textHeight () : sprite.bitmapHeight ();const gaugeHeight = sprite.gaugeHeight ();const gx = 0 ;const gy = bitmapHeight - gaugeHeight;const gw = bitmapWidth - gx;const gh = gaugeHeight;this .drawFullGauge (color1, color2, gx, gy, gw, gh);const iconIndex = item.iconIndex ;const iconBitmap = ImageManager .loadSystem ("IconSet" );const pw = ImageManager .iconWidth ;const ph = ImageManager .iconHeight ;const sx = (iconIndex % 16 ) * pw;const sy = Math .floor (iconIndex / 16 ) * ph;bitmap.blt (iconBitmap, sx, sy, pw, ph, 0 , 0 , 24 , 24 ); const vw = bitmapWidth - 2 ;const vh = bitmapHeight;sprite.setupValueFont (); bitmap.textColor = ColorManager .normalColor (); bitmap.drawText (currentValue, 0 , 0 , vw, vh, "right" );
也没什么特别需要强调的看就完了
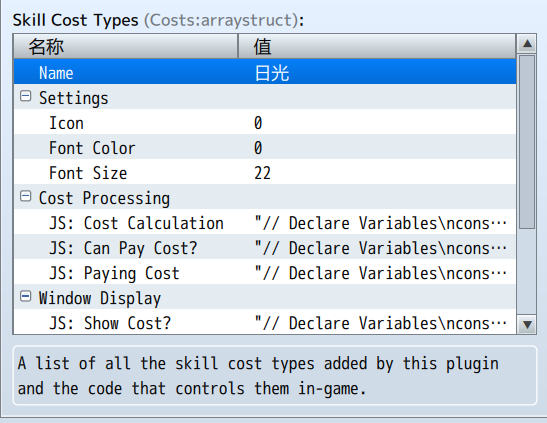
尝试实操 那么直接复制一份potion为样例,我们自己来改
这里我们给消耗命名为“日光”,取5号变量
首先是计算部分,将涉及到注释标签的地方给改了,其他地方不用动
1 2 3 4 5 6 7 8 9 10 11 12 13 14 15 16 17 18 19 20 21 22 23 24 25 26 27 28 29 30 31 32 33 34 35 36 const user = this ;const skill = arguments [0 ];let cost = 0 ;const note = skill.note ;if (note.match (/<SOLAR COST:[ ](\d+)>/i )) { cost += Number (RegExp .$1 ); } if (note.match (/<JS SOLAR COST>\s*([\s\S]*)\s*<\/JS SOLAR COST>/i )) { const code = String (RegExp .$1 ); eval (code); } if (cost > 0 ) { const rateNote = /<SOLAR COST:[ ](\d+\.?\d*)([%%])>/i ; const rates = user.traitObjects ().map ((obj ) => (obj && obj.note .match (rateNote) ? Number (RegExp .$1 ) / 100 : 1 )); const flatNote = /<SOLAR COST:[ ]([\+\-]\d+)>/i ; const flats = user.traitObjects ().map ((obj ) => (obj && obj.note .match (flatNote) ? Number (RegExp .$1 ) : 0 )); cost = rates.reduce ((r, rate ) => r * rate, cost); cost = flats.reduce ((r, flat ) => r + flat, cost); cost = Math .max (1 , cost); } if (note.match (/<SOLAR COST MAX:[ ](\d+)>/i )) { cost = Math .min (cost, Number (RegExp .$1 )); } if (note.match (/<SOLAR COST MIN:[ ](\d+)>/i )) { cost = Math .max (cost, Number (RegExp .$1 )); } return Math .round (Math .max (0 , cost));
然后是判断是否可以支付消耗:
1 2 3 4 5 6 7 8 9 10 11 const user = this ;const skill = arguments [0 ];const cost = arguments [1 ];if (user.isActor () && cost > 0 ) { return $gameVariables.value (5 ) >= cost; } else { return true ; }
接下来是支付消耗:
1 2 3 4 5 6 7 8 9 10 const user = this ;const skill = arguments [0 ];const cost = arguments [1 ];if (user.isActor ()) { const currentValue = $gameVariables.value (5 ); $gameVariables.setValue (5 , currentValue - cost); }
将5号变量减去对应的消耗值
窗口显示可以先暂时不用改,
接下来是获取最大值,直接定位固定的100就行了
1 2 3 4 5 6 const user = this ;return 100 ;
获取当前值:
1 2 3 4 5 6 const user = this ;return $gameVariables.value (5 );
绘制值槽,直接贴过来就行了
测试 测试之前先在数据库测试一下
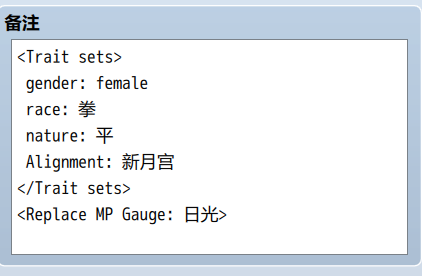
先把主角的MP条给换了,在数据库中的职业 备注加上一条
(我这里弄错了哈。。是放在职业不是角色)
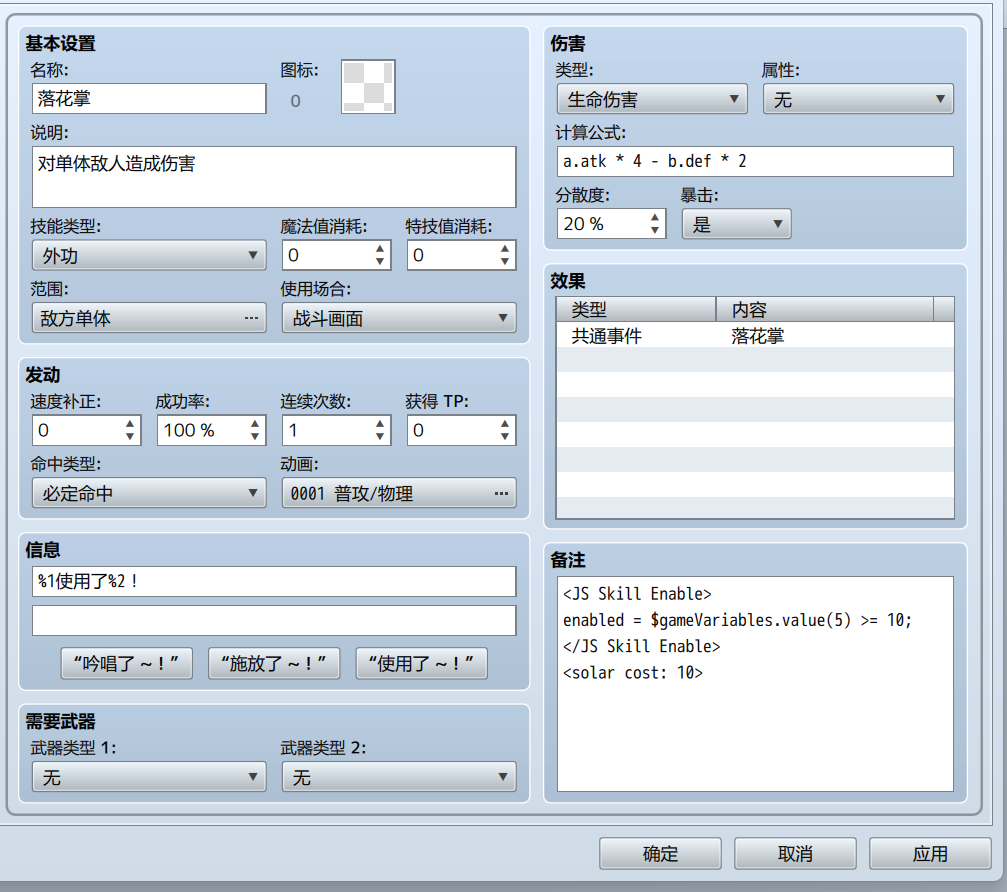
新建一个技能,进行如下设置:
主要是注意备注栏的部分
<JS Skill Enable>是判断技能是否可用,这里是判断5号变量是否大于等于10
<solar cost: 10>就是在技能后面显示消耗多少而已,而它并不会实际帮你扣掉的(也就是说它只是帮你在游戏中显示出来而无法真正的控制数值)
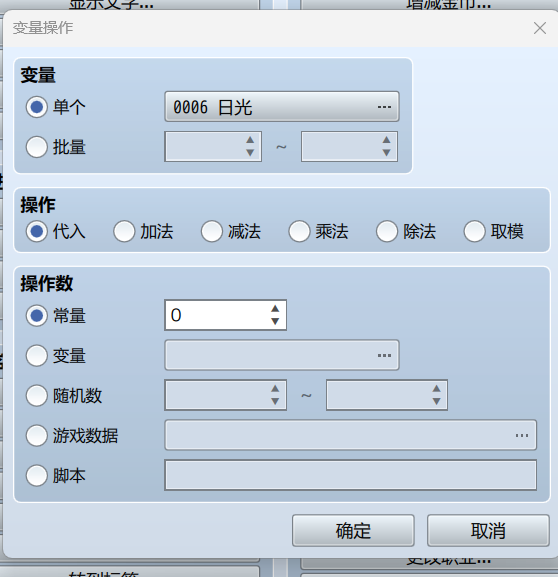
所以要加一个公共事件,在公共事件里面扣除10的变量值就行了
别忘了设置好5号变量(图里弄错了)
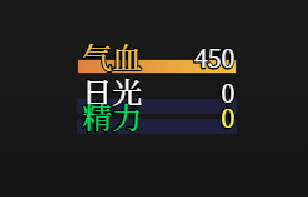
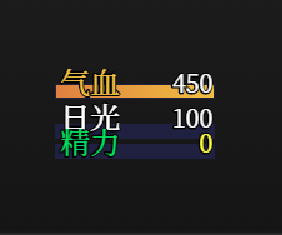
进游戏看到我们主角的MP条已经变了(这里显示比较怪,等会再重新改一下)
在旁边放了条狗,设置对话一次加50点变量,对话两次看到数值也的确变了
进战斗测试,使用技能时自动扣掉10点日光,日光被扣到10点一下后无法使用技能,ok没问题(这里就不截图了)
等待解决的问题 值槽绘制的问题
刚才的测试中值槽没显示出来,是因为我没改默认的值槽颜色,在这里
1
2
const color1 = ColorManager .textColor (6 );const color2 = ColorManager .textColor (31 );
把颜色索引给改了
但是条的位置有点怪怪的,这个暂时不会改,搁置(其实干脆别画值槽了也行)
数值上限
这个日光值虽然设置了100的maximum,但是在通过事件获取变量时仍然会超出100
我直接用并行处理的公共事件来检查了,超过100就直接强行重置为100,但是并行处理事件可能会影响游戏效率,所以仍然需要想办法改善
后记 好麻烦,要不还是别用了吧。。。